Setting up a Network Printer on Mac OS 9
The information in this article applies to:
INTRODUCTION
|
| • | Setting up a Network Printer on Mac OS 9. |
Setting up a Network Printer on Mac OS 9
Setting up a Network Printer on Mac OS 9 (and X)
- Click on the Apple Icon (upper left corner of the screen), then 'Chooser'.
- In the Chooser, highlight the Laserwriter 8 icon.
- Choose your AppleTalk Zone from the list below. You will need to select your 'academic area', then your printer.
- Choose the laser printer you are configuring in the right window of the Chooser.
- Click on the 'Create' button at the bottom.
- A printer icon will now appear next to the printer name. Highlight the printer you are installing and click the 'Setup' button.
- In the next window, choose the AutoSetup option.
- The program will setup the printer.
- Click on 'Configure' and verify that the duplex unit (which allows for 2-sided printing) is installed.
Setting up a Public Printer on Mac OS 9 (and earlier)
- Login to the server and mount Users volume.(if exists)
- Run the Desktop Printer Utility. This is usually located in Applications:Utilities on the Mac’s hard drive. (Double-click on the hard drive, then on Applications, then on Utilities, and finally on Desktop Printer Utility.)
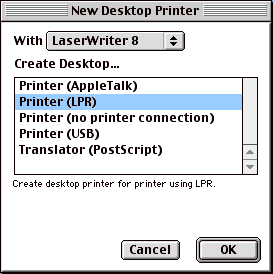
- Click on Printer (LPR) and then click OK.
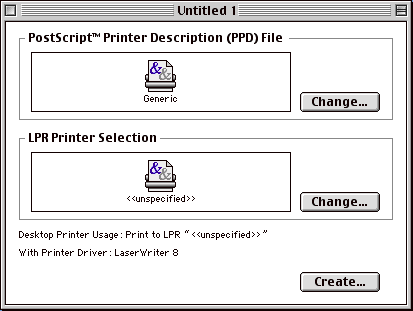
- Under ‘Postscript Printer Description File’ click
Change.
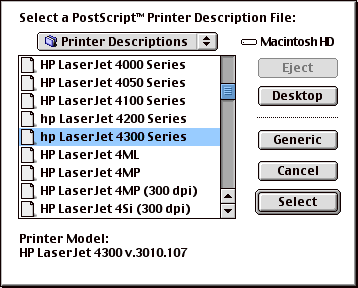
- Select the Printer Description File that corresponds to the
printer you are setting up and click Select.
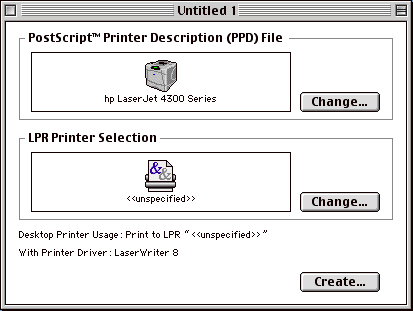
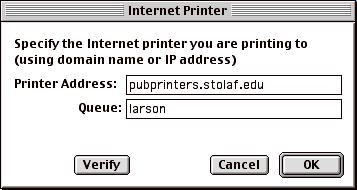
- Under ‘LPR Printer Selection’ click Change.
- In ‘Printer Address’ type in ‘pubprinters.stolaf.edu’ for
public printers. In ‘Queue’ type in the name
of the printer (found on the label on the printer). Click
OK.
- Click Create….
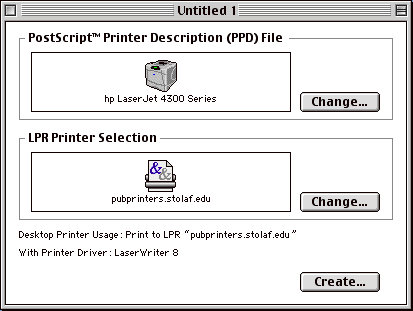
- Type in a name for the printer in the Save dialog box.

- Quit the Desktop Printer Utility. You should now have an icon
representing the printer on your desktop. The printer will now
also appear in the Print dialog box.

| Last Reviewed: | 1/14/2009 |
| Keywords: | kbSetting kbhowtoSetting kbHOWTOSetting #6401 kbAudITProSetting |
| ©1999-2008 Support at pcplans.com |
 SUMMARY